
Through my journey of discovery through Z Brush I have found it to be a very useful tool depending on what exactly you wish to achieve. I have narrowed it down into views of what I personally think I would use Z Brush for.
1. Sculpting a bust of your character to show a fully detailed view of what is wanted in the final model.
2. Adding detail to something low poly without having the problem of a high polygon mesh.
3. Creating small details on things that would be hard to replicate with a low poly count in Maya.
I have found that it really isn't a starting point for a piece of work but more the middle of a pipeline.
All in all I really find it a useful tool for character modelling but not too much for environments even though it can be used for environments in certain publications.
I will try to incorporate Z Brush into my pipe line when it is needed but there are some many ways of using it that I haven't fully gotten into yet that I know will be of much use.
Wednesday, 30 November 2011
Tuesday, 29 November 2011
Head sculpt before and after

This is the basis mesh given to me as a head that is very low poly, which allows adjustment to be made but still keep the topology clean if I want to export it into Maya.

I have found through testing and experimentation that my two favourite tools are layer and Clay build up. Layer allows you to build layer upon layer of detail by raising the mesh up which Clay build up allows you to add a layer of clay as if I was sculpting in real life. This allows me to add and take away clay when needed.
These are the same two tools I used to do the detail around the edges of the coin.

Here is my final piece. I was going for a ancient Japanese Warlord. It was the first image that came into my head for some reason but I am quite proud of it as it is my first time actually sculpting and image in 3D from my minds eye in Z Brush.
Clay build up tool

This is a image from the book "Introducing Z Brush 4" of the clay build up tool. I have found this tool to be extremely useful to me as it lets me add to the object, strand by strand with clay. It feels like almost building up the muscle in the model. I will defiantly be using this with the rest of the tools I have found while experimenting with Z Brush.
To to create coin with Projection

This is the basis of the coin which I imported into Z Brush. With this basic poly object I sub-divide it. This makes it ready to be sculpted but I am not going to use a brush strait away, but instead I will use the Projection Master. This allows me to Project a image as a Alpha channel onto my mesh so that I can sculpt from a pre-generated black and white image.
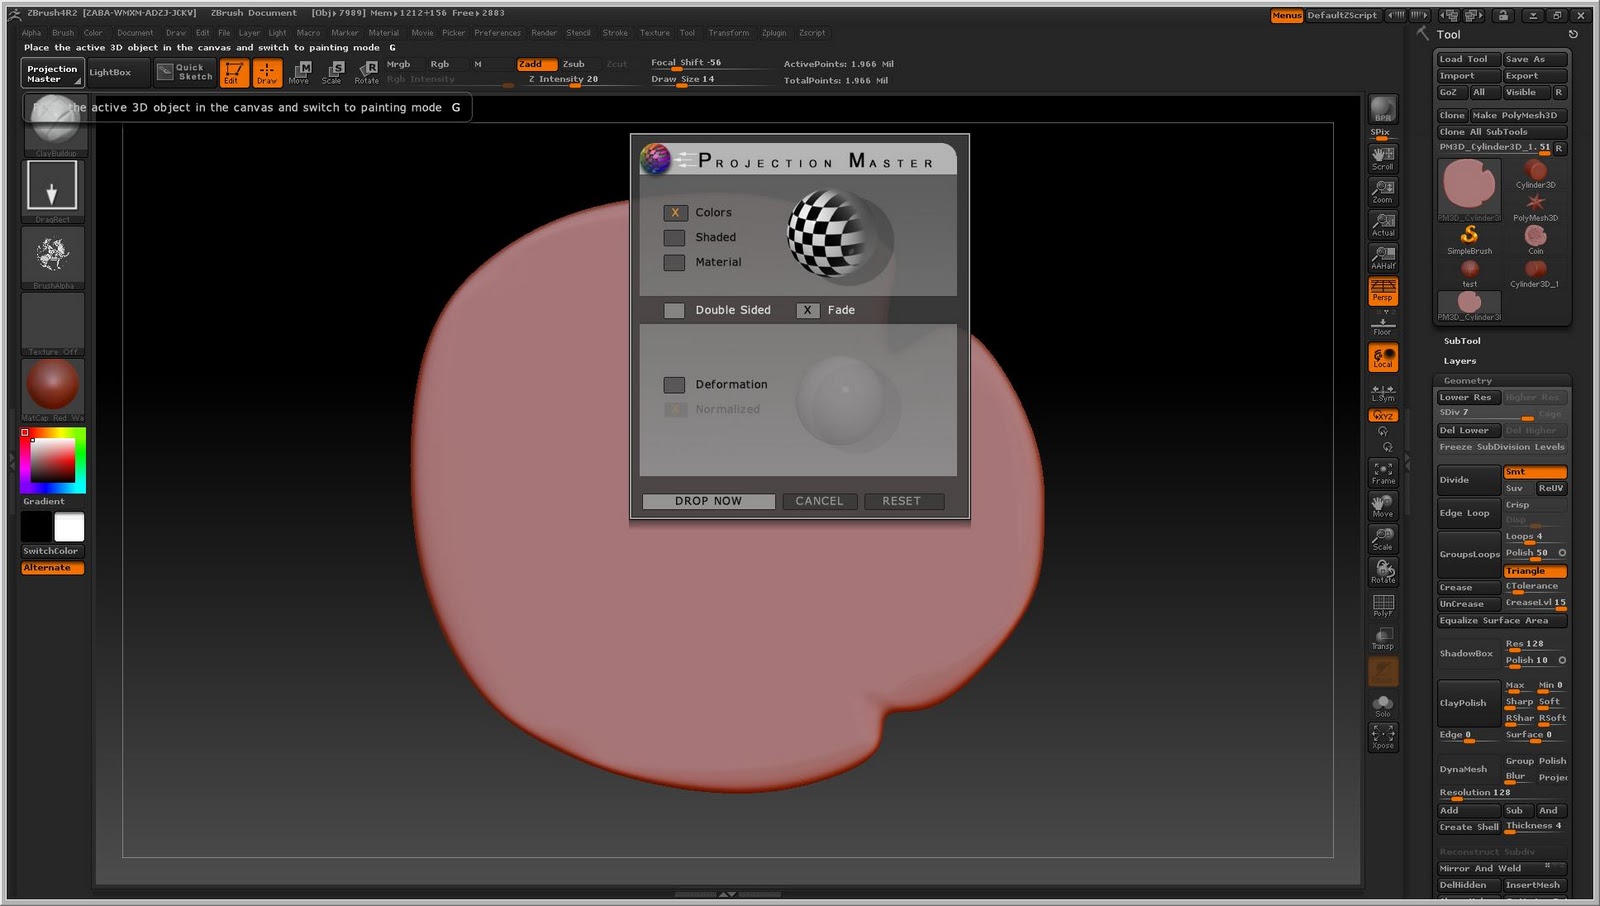
So I click the Projection Master button on the top left of the panel to start the process. This is what you are greeted with.

As I don't want to change the colour of the object, I un-tick the box. As we want to use the projection to change the geometry of the mesh I select Deformation and Normalization.

From here I selected the alpha channel box on the left and have chosen the template for the design I want to be placed on my coin.

Now using the Drag Rectangle tool I am able to project the wanted image as a basis for the geometry to be changed.

Here I have scaled and moved the projection into the desired place to that I can get a clear picture of what it will look like.

I then change the Z intensity so that the projection doesn't protrude too far off the face of the coin.

Once the projection is to the standard that is wanted, I just click the Projection Master button in the top left hand corner again and then select PICKUP NOW.
Finished Coin

This is a coin I created using the tools I have learnt during Armins tutorial as well as reading my books.

I am happy with the outcome of it. I will be showing how I got to this stage in a different post.
Sub divide and definition

Here is a standard cylinder created from the pre-set brushes in Z Brush. As it is such a low poly mesh, if you try and sculpt it now, you would get random blocks rather than the desired definition. To solve this you have to sub-divide the mesh so that each polygon is a fraction of the size.

Once you divide your mesh, you should have a much smoother looking object which is ready to be sculpted.

What I found here is that because of the placement of the polys on the object as well as not being divided enough, the brush stroke came out rather blotchy and fragmented.

I tried to solve this by sub-dividing the mesh a bit more but as it was already fragmented in the pattern, the result was just a smoother blotchy line.

But if you re-sculpt the object you can see that the smoothness that was desired originally is now there because of there being enough polys to cop with the definition.

This is an example of what can be done using the Active Symmetry tool.

This can be useful for many things and it can be duplicated on any axis, which is good when you are creating a near symmetrical object. After you can always use the tools with there default settings to add variance and detail to the object, such as me adding bulges to the sphere to give the feel of a real living object.

This setting can be found at the top bar menu, in which you can choose where to mirror the geometry to while you are sculpting.
I found this to be a very helpful tool, especially for faces as they are not symmetrical but they are near enough that with a few tweaks afterwards you can get a great looking face.
Subscribe to:
Posts (Atom)